Fact Checked
In case of an injury due to a car accident, assault, fall or any other form of physical trauma, it is recommended that you bandage the arm and splint it, if necessary. Once an arm is splinted, immobilize it in order to reduce pain and further injury. To learn how to do arm slings and manage other skeletal emergencies enrol into a first aid class with a credible provider.
Instructions
- Splint the affected arm
- Secure the injured arm with a pile of clothing or any other soft material to maintain a proper position.
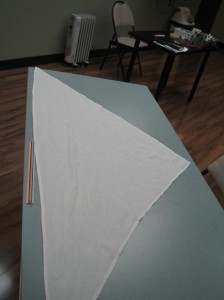
A triangle bandage is an essential component of any first aid kit. These are great tools to create slings out of. - To sling an arm, you will need 2 triangular bandages. You can also cut a piece of cloth similar to a pillow of 40 inches square. Next, you have cut or fold the cloth diagonally to produce a triangular piece of material.
- Position the triangular bandage in such a way that the point opposite to the longer side is facing the injured person and pointing towards injured arm.
- Position the arm in a V shape so that the elbow is bent at 90 degrees and the forearm is at 30 degrees with the ground. Keep your hand above elbow level.
- Create a hammock or cradle around the affected arm with the triangular bandage or cloth.
- Pull the side of the bandage that is furthest from the injured person above the side of the neck that is closest to the injury.
- Pull the bandage that is furthest from the casualty and pull it over the side of the neck that is furthest from the injured arm.
- Pull the material taut, gently without affecting the bandage around the injured arm.
- Twist the bandage into a long spiral.
- Tie both ends of the bandage behind the casualty’s neck.
- Use the other triangular bandage to wrap the arm.
- Fold the point that is opposite to the longer end in order to allow it to get in contact with the longer side. Keep folding in the same direction until you obtain a piece of cloth, about 3-4 inches wide.
- Pull the bandage under the armpit of the injured arm and the over the injured arm. Make sure the cloth is parallel to the ground.
- Tie both ends of the bandage together
- Check the fingers of the injured arm to observe any changes in circulation, sensation and motion.
Tips
- Make sure that the sling contains the elbow as well to prevent the arm from slipping off the sling. You can use the safety pin to keep the end of the bandage wrapped around the arm with the part of the sling opposite to the elbow, intact.
- In case any pain occurs by securing the elbow, leave the elbow free.
- If you do not have any extra triangular bandages, you can use webbing, ropes, pantyhose, a pack strap or any other similar piece of clothing to sling the arm.
Caution
- Do not secure or bandage the fingers as you will have to check for signs of circulation, sensation and motion regularly.
- Make sure you do not secure the sling too tight as it may discourage circulation.
- If the casualty loses sensation of the ring finger or the pinky, you may have to pad the elbow as well to reduce pressure on the nerves.
Related Video to Making an Arm Sling